
📖 Table of Contents
Part 1: The World of Programming Around Us
Part 2: The Alphabet and Vocabulary of Programming
Part 3: Building Our First Programs
Part 4: Our Amazing Brain
Part 5: Creative Projects
Part 6: Programming in the Real World
Chapter 19 of 27
5: Creative Projects
Chapter 19: "Creating Our Mini-Website"
The next day, Alice came to Professor Bit with shining eyes.
— Professor, I came up with a branching story about time travel! — she exclaimed. — But how do I share it with friends? Not everyone will like typing commands in the console.
The Professor smiled:
— Great question, Alice! And I have a wonderful solution — we'll create a web page with your story. This will be your first mini-website!
Byte joyfully spun around:
— Web development is one of the most popular areas of programming! You can create websites that the whole world will see!
— Where do we start? — Alice asked.
— Websites are created using three main languages, — the Professor explained, opening a laptop. — HTML handles structure and content, CSS handles appearance, and JavaScript handles interactivity.
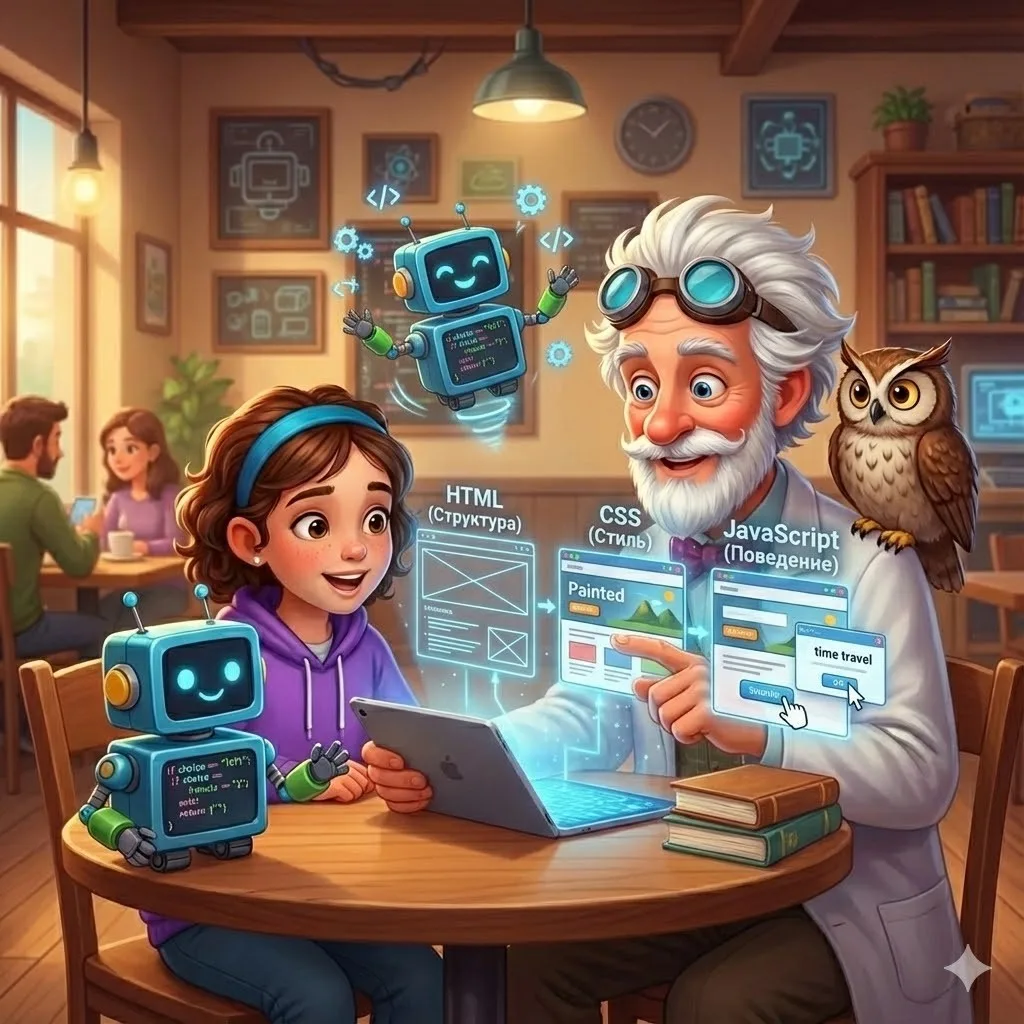
Три языка — три верных друга:
Один кладёт каркас и свод,
Другой раскрашивает стены,
А третий оживляет ход.
HTML — и кости, и основа,
CSS — наряд, палитра, свет,
JavaScript — живое слово,
Что отвечает «да» и «нет».
Страница — дом в большом просторе,
Где код становится окном.
Ты строишь сайт — и в этом доме
Друзьям найдётся тёплый дом.
The Professor opened a simple text editor and began writing:
html


    My First Web Page
Time Travel
You discover a strange device in the basement of an old house. It
looks like a pocket watch, but with many buttons and dials.
Suddenly the device begins to glow!
What will you do?
— Wow! — Alice exclaimed, looking at the screen. — This code looks more complex than what we did before.
— Don't worry, — the Professor reassured her. — Let's break it down by parts. At the beginning we have the HTML structure — it's like the skeleton of our page:
html
My First Web Page
— HTML consists of tags marked by angle brackets, — the Professor continued. — For example, denotes a first-level heading, — a paragraph of text, — a button.
— What is CSS? — Alice asked, pointing to the styles section.
— CSS — Cascading Style Sheets, — the Professor explained. — They define how elements will look: their color, size, position on the page, etc. Here's part of the CSS from our example:
css
body {
  font-family: Arial, sans-serif;
  margin: 40px;
  line-height: 1.6;
  background-color: #f5f5f5;
}
h1 {
  color: #333;
  text-align: center;
}
— Here we specify that text on the entire page (body) should use the Arial font, have 40-pixel margins, and a light gray background. And first-level headings (h1) should be dark gray and centered.
Logic added:
— CSS works on the principle of selectors. We select an element (for example, all paragraphs p or all headings h1) and define styles for it.
— What do .container and .choice-button mean? — Alice wondered.
— These are classes, — the Professor explained. — We can assign any element a class using the class attribute and then apply styles to all elements with that class. For example:
html
css
.container {
  max-width: 800px;
  margin: 0 auto;
  padding: 20px;
  background-color: white;
  border-radius: 5px;
  box-shadow: 0 2px 5px rgba(0, 0, 0, 0.1);
}
— I see! — Alice nodded. — How does interactivity work? I see that buttons are somehow connected to JavaScript.
— Well observed! — the Professor praised. — JavaScript is a programming language that runs in the browser and allows making pages interactive. In our example, we use JavaScript functions to change page content when buttons are clicked:
javascript
function makeChoice(choice) {
  if (choice === 'press') {
    document.getElementById('story-container').innerHTML = `
            You press the button, and a bright glow appears around you...

        `;
  } else if (choice === 'put_down') {
    document.getElementById('story-container').innerHTML = `
            You decide not to risk it and put the device back...

        `;
  }
}
— This function is called when a button is clicked using the onclick="makeChoice('press')" attribute. It checks what choice the user made and updates the story container content, inserting new text and new buttons.
— How are HTML, CSS, and JavaScript related? — Alice asked.
Byte showed a diagram on his screen:
HTML (structure) → What is on the page
CSS (styles) → How it looks
JavaScript (scripts) → How it behaves
— You can draw an analogy with a person, — the Professor suggested. — HTML is like the skeleton and organs, determining what the body consists of. CSS is the appearance: hair color, height, clothing. And JavaScript is behavior: how a person moves, speaks, reacts to others.
— Now let's see how our page looks, — the Professor suggested and opened the HTML file in the browser.
A beautiful page appeared on the screen with the heading "Time Travel", story text, and two green buttons for choices. Alice clicked the first button, and the page content changed — new text and new choice options appeared.
— This is amazing! — she exclaimed. — My story comes to life right before my eyes!
— Now let's improve our website, — the Professor suggested. — For example, let's add images and sound effects.
He added several lines of code:
html
— We added a style for images and code to play sound during time travel, — the Professor explained. — Now the story has become more atmospheric.
— Can we add background music? — Alice asked.
— Of course! — the Professor nodded and added more lines:
html
— Now we have a button to turn background music on/off, — the Professor explained. — This is important, as not all users want to hear music when visiting a site.
— How great! — Alice admired. — Can we add inventory, like in our text game?
— Great idea! — the Professor smiled. — Let's create a separate block for inventory and variables in JavaScript to store items:
html


    Time Travel
          id="inventory"
      style="background-color: #f0f0f0; padding: 10px; margin-bottom: 15px; border-radius: 5px;"
    >
      Inventory:
      Empty
— Now the player can find items during the story, and they will be displayed in the inventory, — the Professor explained. — These items can affect further events, as we did in the text version.
— Can such a site be published so my friends can play it? — Alice asked.
— There are several ways, — the Professor replied. — The simplest is to use free hosting services like GitHub Pages, Netlify, or Vercel. You upload your files to these platforms, and they make your site available on the internet.
— But remember about security, — Logic warned. — Don't include personal information on your site and always ask parents' permission before publishing anything on the internet.
— Creating websites is a huge field with many possibilities, — the Professor summarized. — We've only touched the basics, but even with this knowledge, you can already create interesting projects. As you study HTML, CSS, and JavaScript, you'll be able to make increasingly complex and beautiful sites.